Sometimes you need to connect a USB device to a machine that is physically located somewhere else.
In my case, I wanted to use an RFXcom USB device — the radio dongle my Home Assistant instance relies on to talk to my 433 MHz sensors and switches — from my Proxmox server, while keeping the device physically connected to a small Raspberry Pi Zero W located more strategically in the house.
USB/IP provides a simple way to do this.
The Raspberry Pi acts as the USB/IP server. It has the physical USB device connected to it and exports that device over the network.
The Proxmox host acts as the USB/IP client. It imports the remote device and exposes it to Linux as if it were connected directly to the Proxmox machine.
The resulting architecture looks like this:
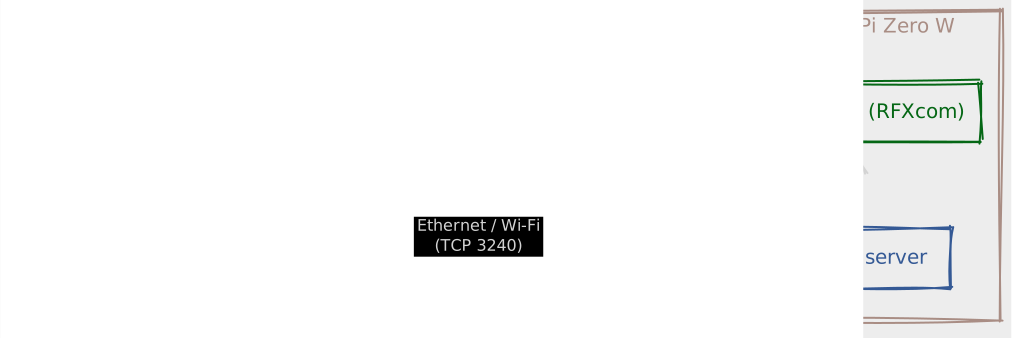
The nice part is that the application running on the Proxmox host does not need to know that the physical USB device is somewhere else. From the client's point of view, it appears as a normal USB device.
This article shows how I configured the complete setup, including automatic startup with systemd on both sides.
Security note: USB/IP is intended for trusted networks. The
usbipddaemon does not provide authentication or authorization by itself, so the server should not be exposed directly to untrusted networks. By default,usbipdlistens on TCP port3240. If the Raspberry Pi runs a firewall (ufw,nftables, …), remember to allow TCP port 3240 from your Proxmox host, otherwise the client will time out when trying to attach the device.
Server side — Raspberry Pi
The Raspberry Pi is responsible for physically connecting the USB device and exporting it through USB/IP.
I used a small Raspberry Pi Zero W for this project.
Pi image creation
Insert the microSD card into your computer.
Download Raspberry Pi Imager from the official Raspberry Pi website and install it.
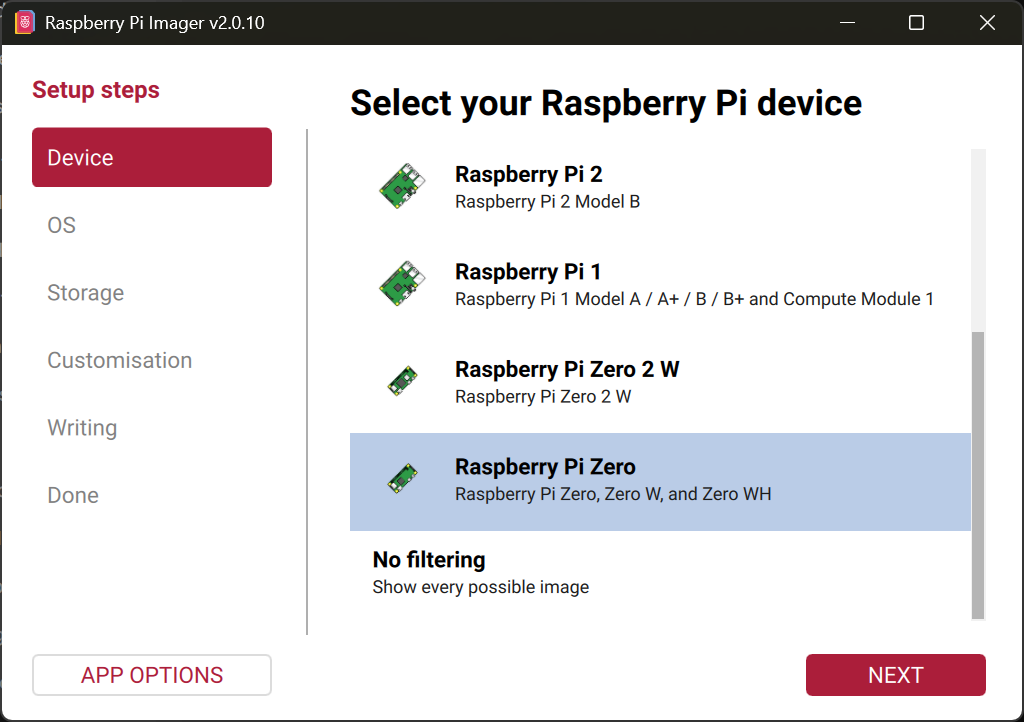
On the first screen, select the Raspberry Pi device.
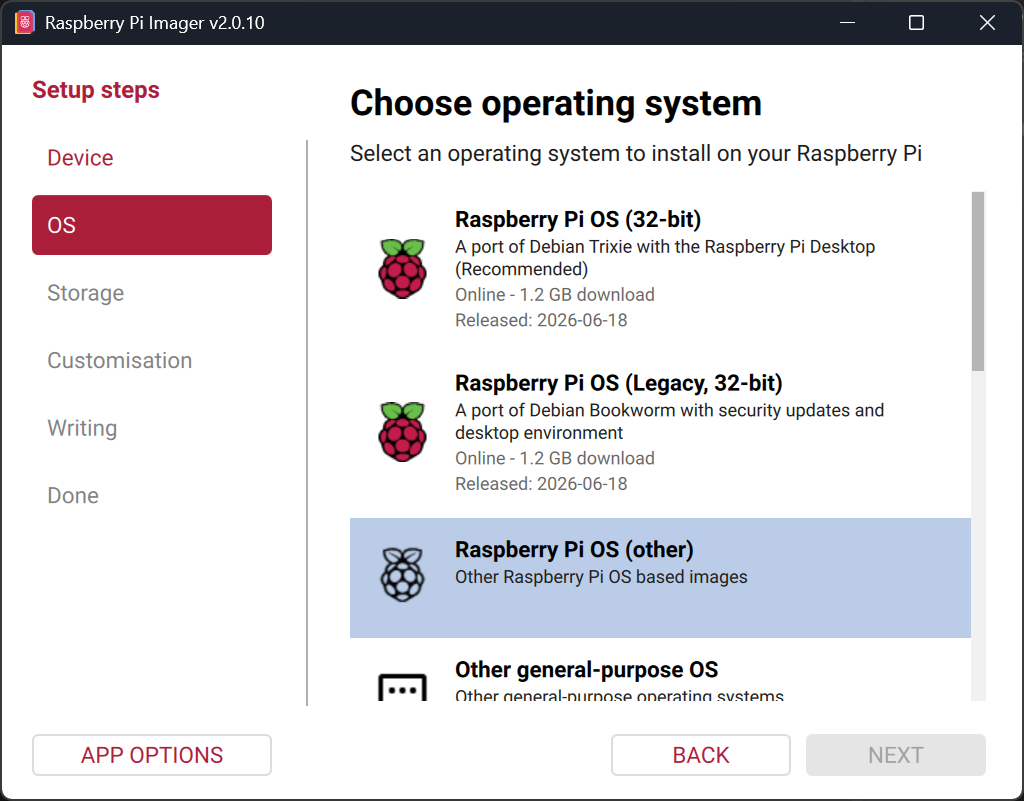
For the operating system, select Raspberry Pi OS (other).
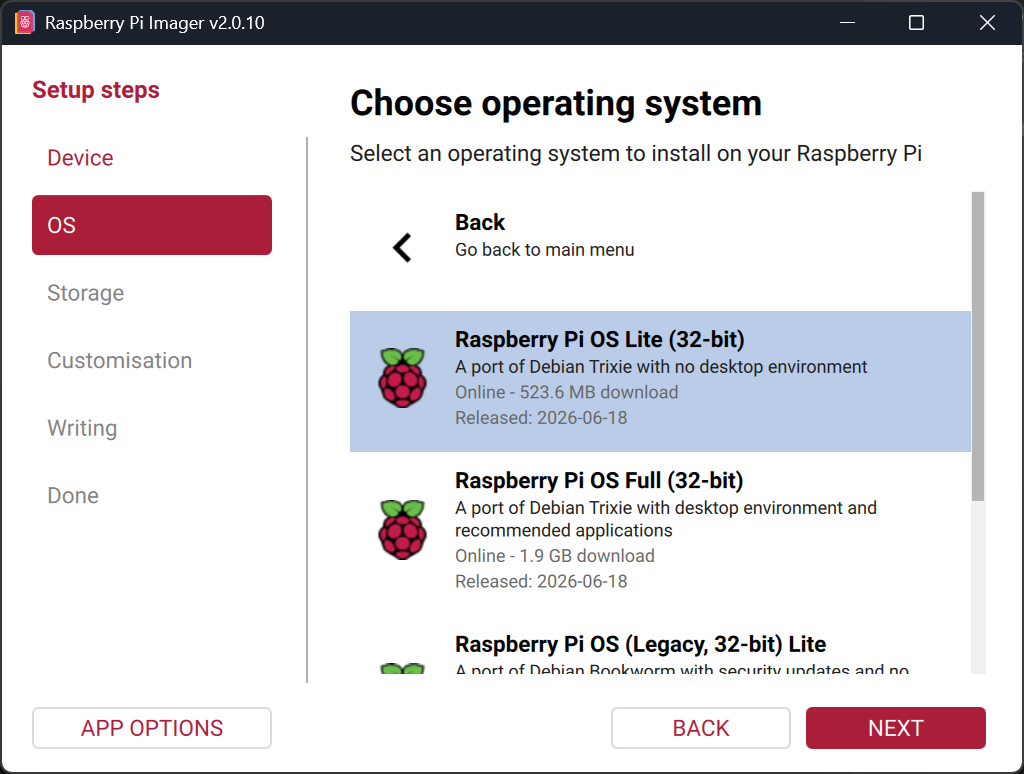
The Raspberry Pi Zero W is a 32-bit device, and we don't need a graphical desktop for this project, so select the Lite version.
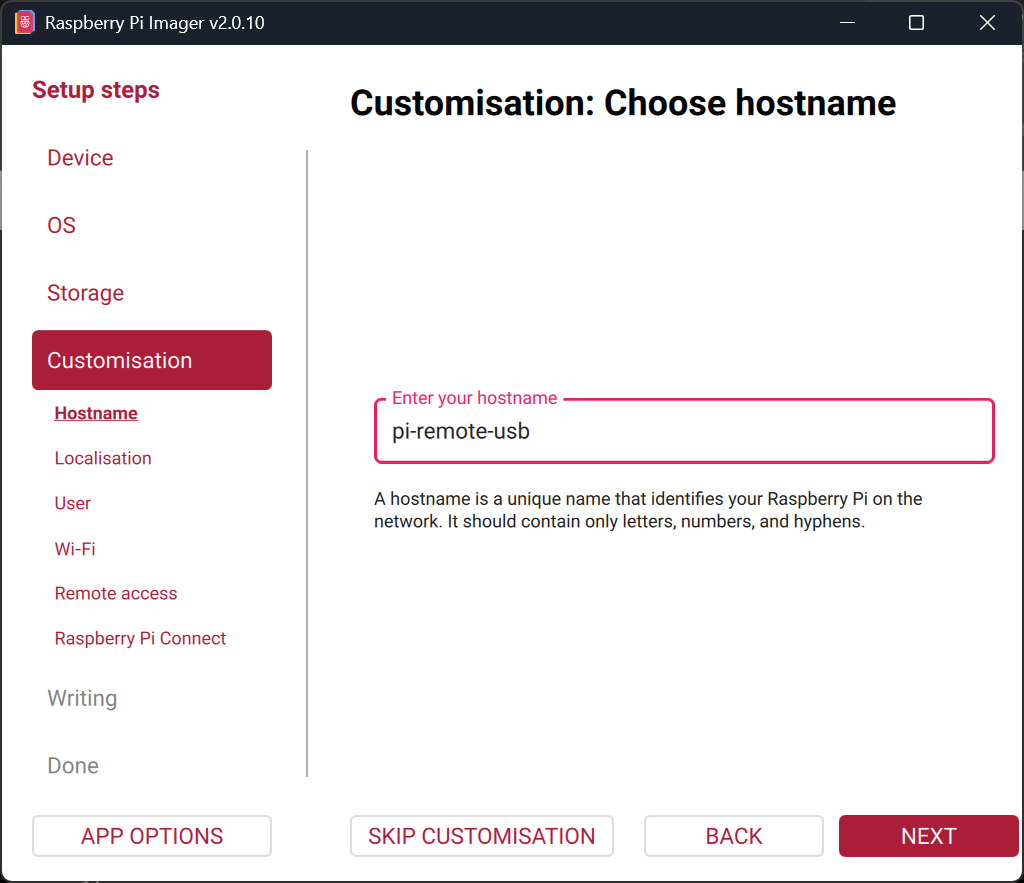
Give the Raspberry Pi a hostname. I am using pi-remote-usb.
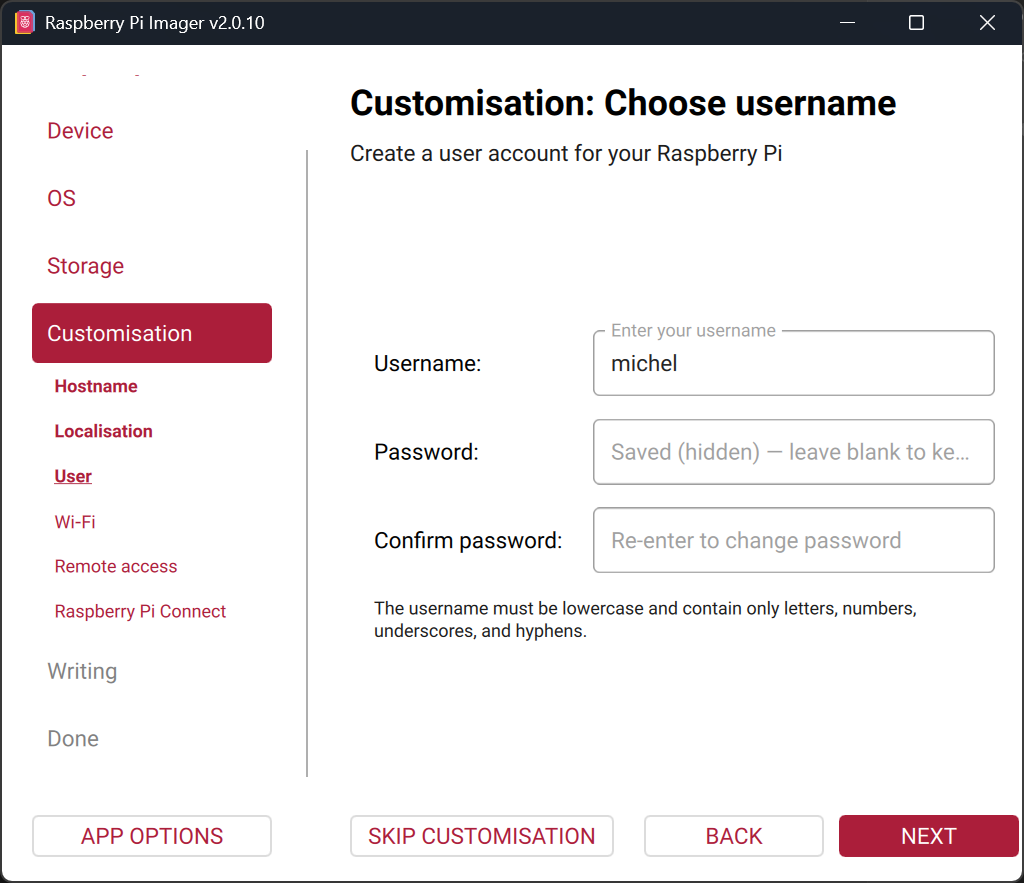
Configure the username and password now. Choose a strong password and keep the credentials somewhere safe, for example in KeePass.
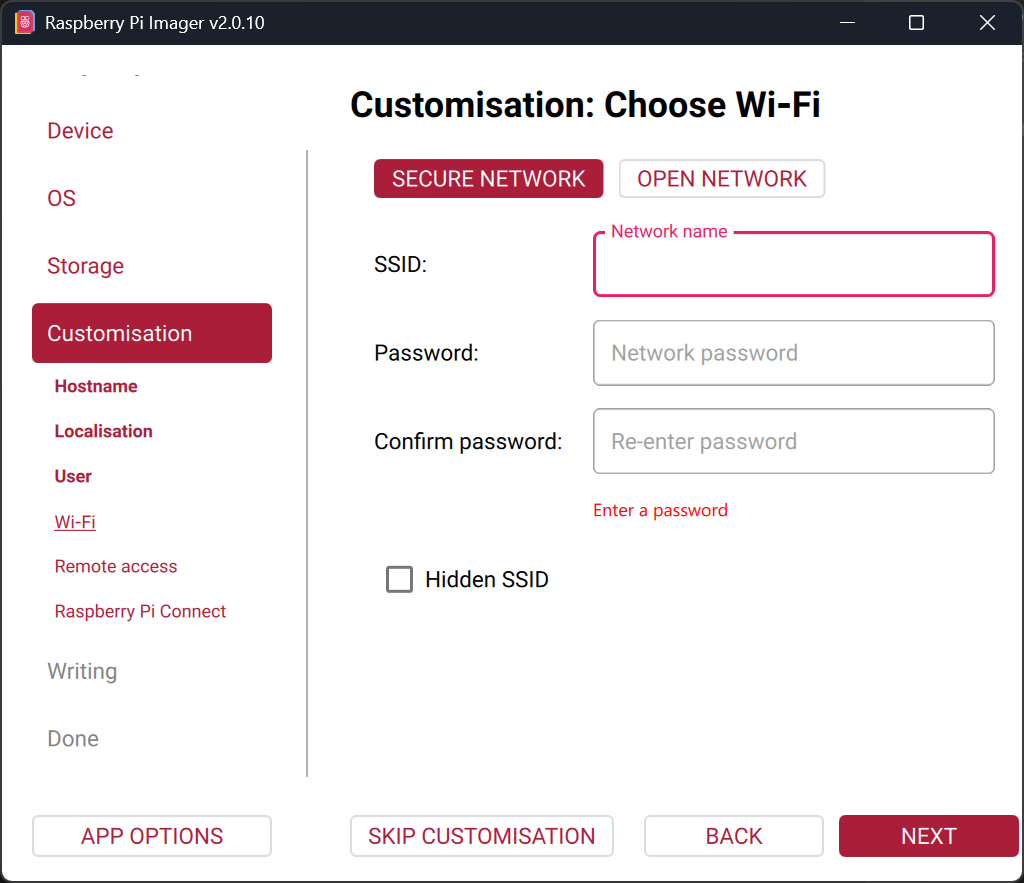
Because I am using the Pi Zero W, I can configure its Wi-Fi connection directly in Raspberry Pi Imager.
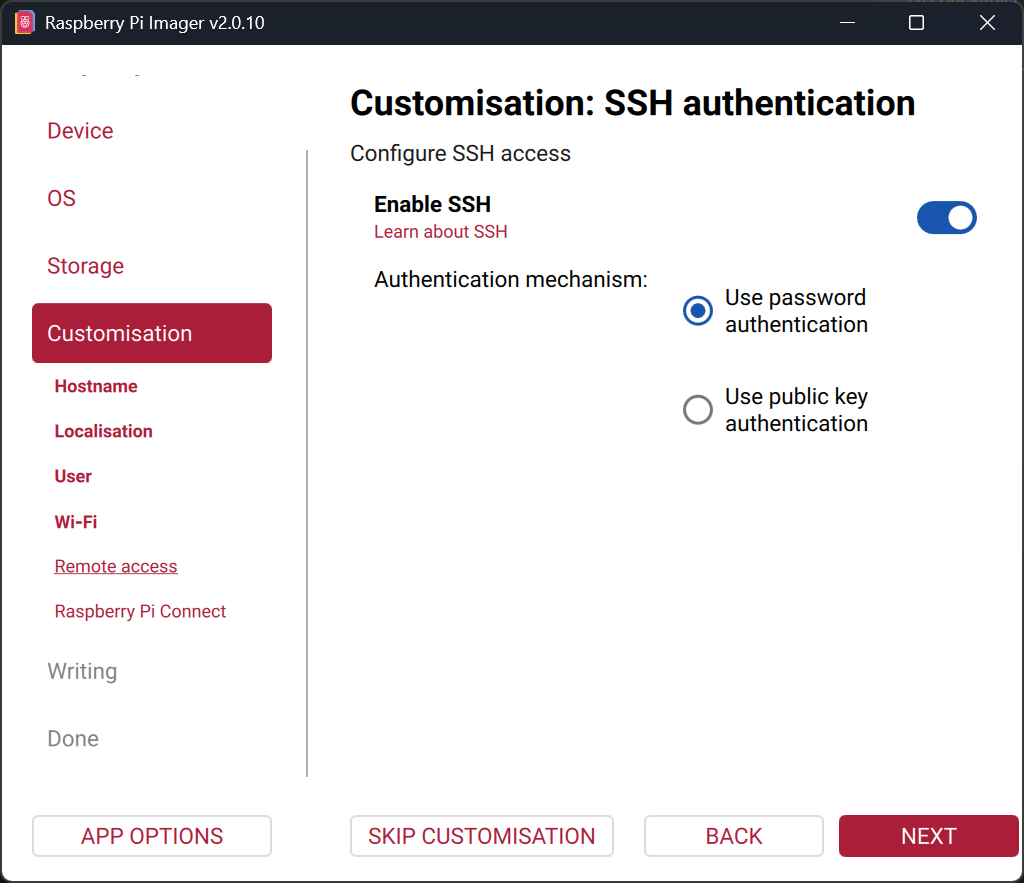
Most importantly, enable SSH.
We will access the Raspberry Pi remotely, so there is no need for a keyboard, mouse, or monitor.
Pi Connect is not required for this project. Pi Connect provides remote access to the Raspberry Pi through a web browser, but we will use SSH instead.
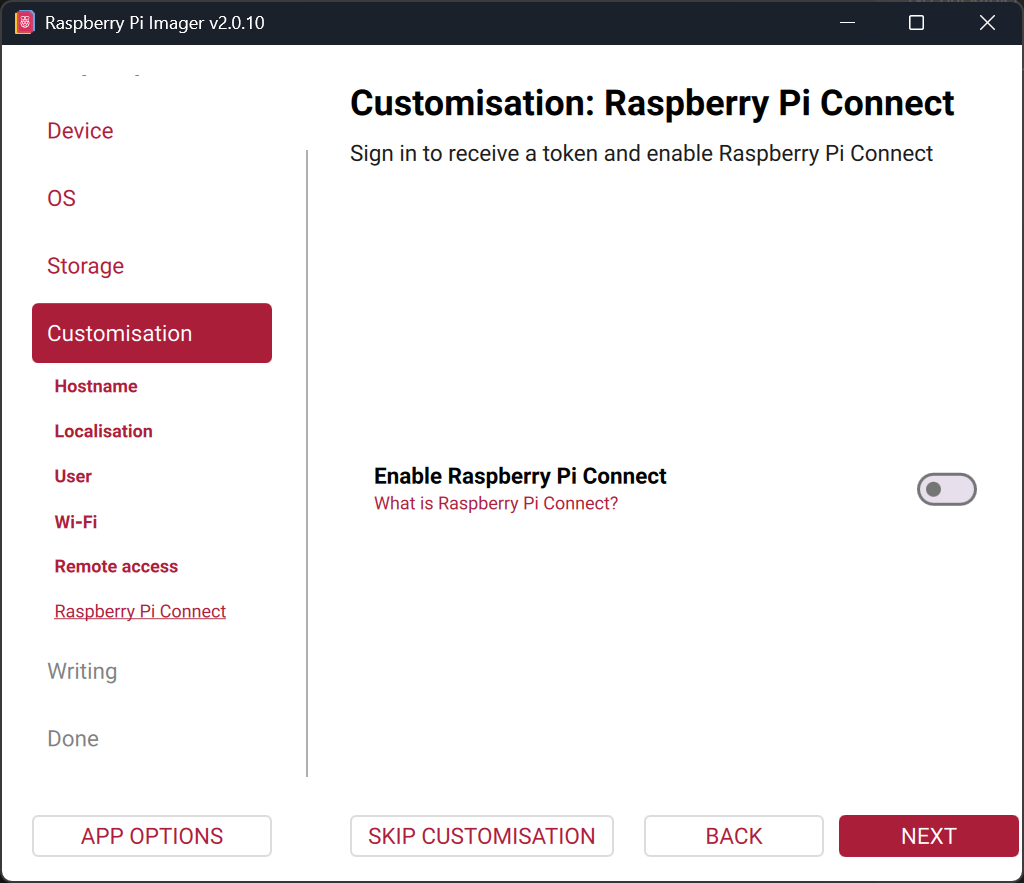
Review the configuration carefully and write the image to the microSD card.
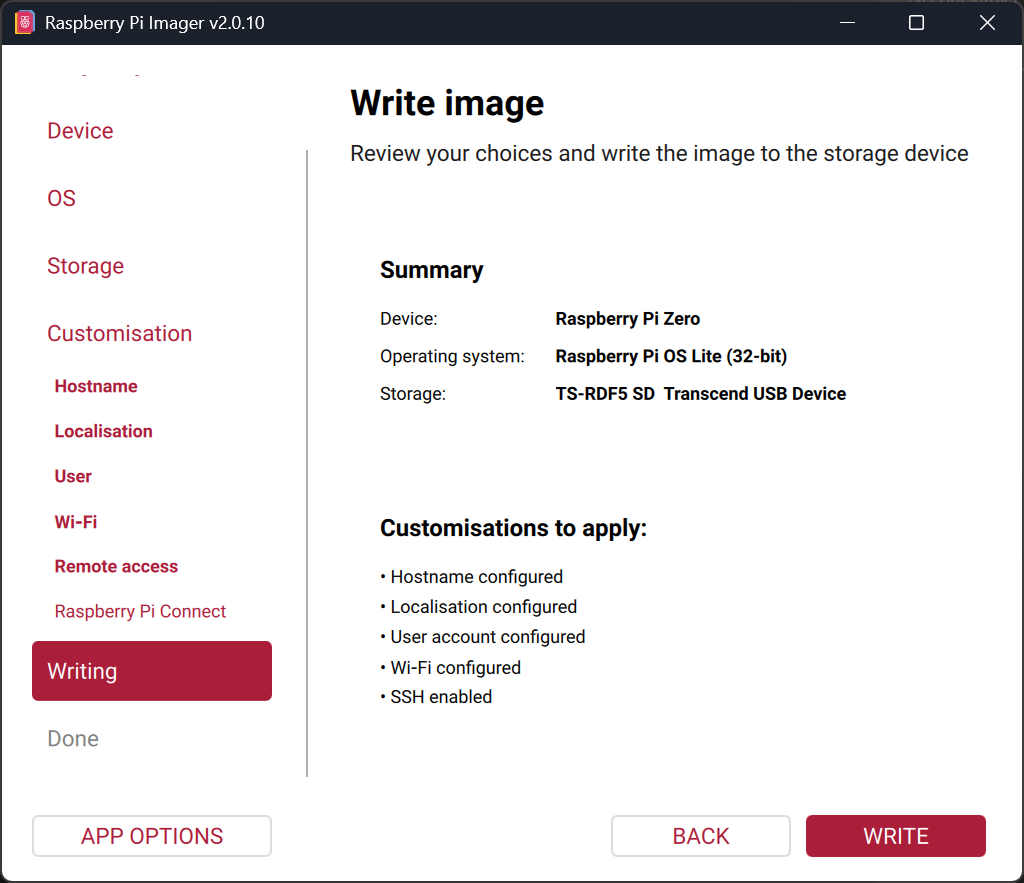
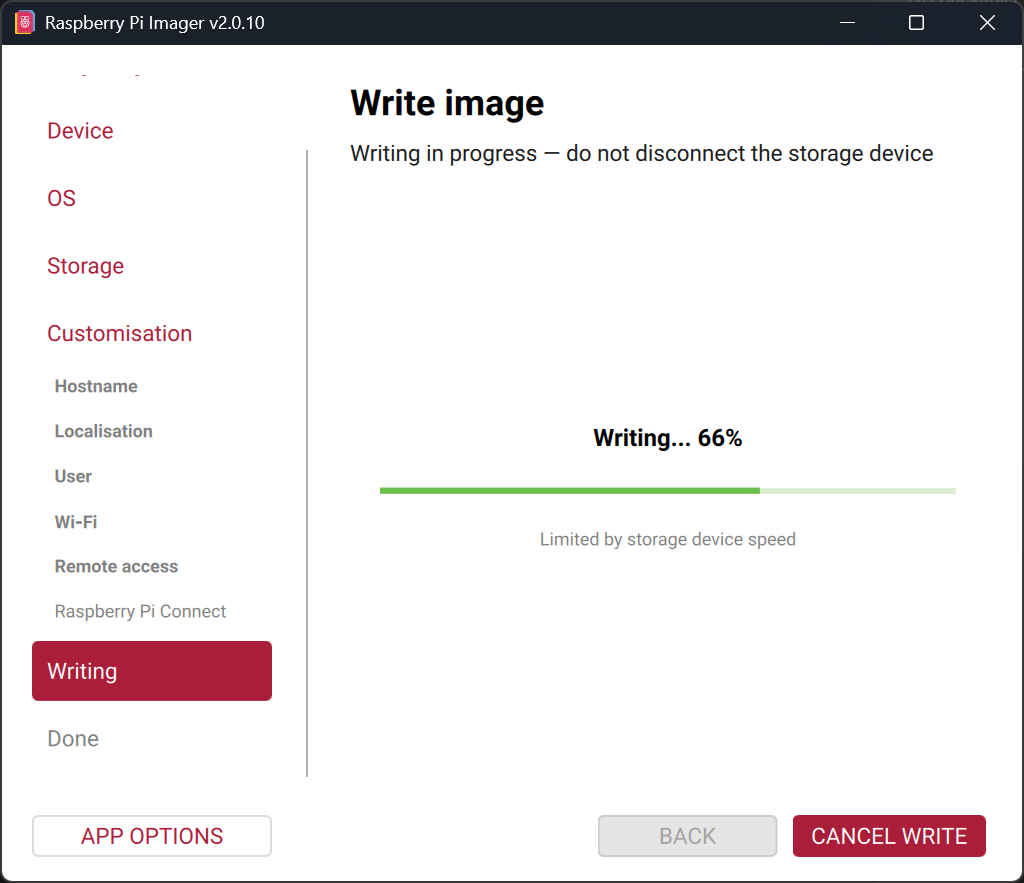
Once the process is complete, insert the microSD card into the Raspberry Pi and power it on.
Start the Pi
After powering on the Raspberry Pi, wait a few minutes for the first boot to complete and for the Wi-Fi connection to become available.
From a Windows computer, you can check whether the Raspberry Pi is reachable with:
ping -t pi-remote-usb.localNote: Windows resolves .local hostnames through mDNS (Bonjour/Apple services or the native mDNS support in recent Windows versions). If the plain hostname doesn't resolve, try the explicit .local suffix as shown above, or find the IP address from your router's DHCP client list instead.
After a while, you should start receiving replies:
Pinging pi-remote-usb.local [192.168.0.16] with 32 bytes of data:

...
Reply from 192.168.0.16: bytes=32 time=1ms TTL=64
Reply from 192.168.0.16: bytes=32 time=10ms TTL=64
Reply from 192.168.0.16: bytes=32 time=13ms TTL=64
...
Once the Raspberry Pi is reachable, connect to it using SSH:
ssh michel@pi-remote-usbOn the first connection, SSH will ask you to verify the host key:
The authenticity of host 'pi-remote-usb (192.168.0.16)' can't be established.
ED25519 key fingerprint is SHA256:...
This key is not known by any other names.
Are you sure you want to continue connecting (yes/no/[fingerprint])?
Enter yes
You will then be asked for the password you configured in Raspberry Pi Imager (you saved it, right?).
Once authenticated, you should see a shell similar to this:
Linux pi-remote-usb 6.18.34+rpt-rpi-v6 #1 Raspbian 1:6.18.34-1+rpt1 (2026-06-09) armv6l

The programs included with the Debian GNU/Linux system are free software;
the exact distribution terms for each program are described in the
individual files in /usr/share/doc/*/copyright.

Debian GNU/Linux comes with ABSOLUTELY NO WARRANTY, to the extent
permitted by applicable law.
michel@pi-remote-usb:~ $
At this point, the Raspberry Pi is ready for the USB/IP configuration.
Install USB/IP
The first step is to install the USB/IP tools on the Raspberry Pi:
sudo apt update
sudo apt install -y usbip hwdata
The usbip package provides the tools required to export and manage USB devices over the network.
I also install hwdata. It provides hardware identification databases that allow USB devices to be displayed with human-readable manufacturer and device names instead of just their raw USB vendor and product IDs.
For example, a USB device may be identified by:
0403:6001
The hwdata database allows Linux to identify this as:
Future Technology Devices International, Ltd : FT232 Serial (UART) IC
This is particularly useful when several USB devices are connected and you need to identify the one you want to export.
Identify the USB device
Let's check which USB devices are currently connected:
usbip list -lFor example, my RFXcom device appears as:
- busid 1-1 (0403:6001)
  Future Technology Devices International, Ltd : FT232 Serial (UART) IC (0403:6001)
There are two pieces of information that are important here:
1-1is the USB bus ID (BUSID). This is the identifier USB/IP uses to refer to the physical USB device.0403:6001is the USB vendor ID and product ID (VID:PID).
In my case, 0403 identifies Future Technology Devices International and 6001 identifies the FT232 USB-to-serial interface used by the RFXcom.
USB/IP also provides a machine-readable output format:
usbip list -p -lThis produces:
busid=1-1#usbid=0403:6001#
The -p option produces a parsable format, which will be useful later when we automatically find the correct BUSID from a systemd service.
This is important because the BUSID is not something I want to hard-code if I can avoid it. The service can instead search for the device using its USB vendor/product ID and extract the corresponding BUSID automatically.
Create the USB/IP export service
Now let's create a custom systemd service on the Raspberry Pi to automatically export the USB device over USB/IP.
In my case, the USB device is an RFXcom.
Systemd provides two main locations for service unit files:
| Location | Role | Priority |
|---|---|---|
| /lib/systemd/system/ | Services provided by the operating system or installed packages | low |
| /etc/systemd/system/ | Custom services and local overrides | high (override /lib/) |
For our own service, we should use /etc/systemd/system/.
In this folder you will find different kinds of file:
- .service : text file defining how to run a script, command, or application in the background
- .target.wants or .target.requires folders: for example graphical.target.wants, multi-user.target.wants are folders containing symbolic links for services started on mode "multi-user" for example
.service.d/folder : allow you to change the behaviour of an existing service through a.conffile.
This also has the advantage that our custom configuration is kept separate from files managed by the operating system or installed packages.
Create a new service file called usbip-export.service:
sudo nano /etc/systemd/system/usbip-export.serviceAdd the following content:
Here is the file content that I will explain just below.
[Unit]
Description=Export automatic USB/IP RFXcom
After=network-online.target
Wants=network-online.target

[Service]
Type=oneshot
ExecStartPre=/sbin/modprobe usbip_core
ExecStartPre=/sbin/modprobe usbip_host
ExecStartPre=/usr/sbin/usbipd -D
ExecStartPre=/bin/sleep 2
ExecStart=/bin/bash -c "BUSID=$$(usbip list -p -l | grep '0403:6001' | awk -F'#' '{print $$1}' | awk -F'=' '{print $$2}'); if [ -n \"$$BUSID\" ]; then usbip bind -b $$BUSID; fi"
ExecStop=-/bin/bash -c "BUSID=$$(usbip list -p -l | grep '0403:6001' | awk -F'#' '{print $$1}' | awk -F'=' '{print $$2}'); if [ -n \"$$BUSID\" ]; then usbip unbind -b $$BUSID; fi"
RemainAfterExit=yes

[Install]
WantedBy=multi-user.target
Note: The
0403:6001value is the USB vendor ID and product ID of the RFXcom USB interface in my setup. If you are using a different USB device, replace this value with the appropriateVID:PID.
Understanding the service file
The service is made up of three sections: [Unit], [Service], and [Install].
[Unit]
[Unit]
Description=Export automatic USB/IP RFXcom
After=network-online.target
Wants=network-online.target
Description is simply a human-readable description of the service.
After=network-online.target tells systemd to start this service after the network is considered online.
Wants=network-online.target adds network-online.target as a dependency. In other words, starting our service also requests that the network-online target is started.
This is important here because the USB/IP daemon will eventually accept connections from the network.
[Service]
[Service]
Type=oneshot
The service uses the oneshot type because its main job is to execute a sequence of commands to initialise the USB/IP server and bind the USB device.
It is not a long-running process itself. The USB/IP daemon started by the service is the process that remains running in the background.
The first two commands load the kernel modules required for USB/IP:
ExecStartPre=/sbin/modprobe usbip_core
ExecStartPre=/sbin/modprobe usbip_host
usbip_core provides the core USB/IP functionality.
usbip_host provides the USB/IP host functionality required to export USB devices.
Next, we start the USB/IP daemon:
ExecStartPre=/usr/sbin/usbipd -DThe -D option tells usbipd to run as a daemon in the background.
We then wait two seconds:
ExecStartPre=/bin/sleep 2This gives the daemon a short amount of time to initialise before we try to bind the USB device.
Finally, we find the RFXcom USB device and bind it to USB/IP:
ExecStart=/bin/bash -c "BUSID=$$(usbip list -p -l | grep '0403:6001' | awk -F'#' '{print $$1}' | awk -F'=' '{print $$2}'); if [ -n \"$$BUSID\" ]; then usbip bind -b $$BUSID; fi"We will break this command down in the next section.
Right after ExecStart, an ExecStop uses the same BUSID-lookup logic, but calls usbip unbind instead of usbip bind:
ExecStop=-/bin/bash -c "BUSID=$$(usbip list -p -l | grep '0403:6001' | awk -F'#' '{print $$1}' | awk -F'=' '{print $$2}'); if [ -n \"$$BUSID\" ]; then usbip unbind -b $$BUSID; fi"This runs when the service is stopped, for example with systemctl stop usbip-export.service, or during a normal shutdown. It cleanly unbinds the device from USB/IP, leaving usbipd with nothing exported. The leading - tells systemd to ignore a non-zero exit status, in case there is nothing to unbind.
The last option in the [Service] section is:
RemainAfterExit=yesThis tells systemd to consider the service active after the ExecStart command has completed successfully.
Without this option, a oneshot service would normally return to an inactive state after its commands have finished.
[Install]
[Install]
WantedBy=multi-user.target
This section defines how the service is integrated into the boot process.
WantedBy=multi-user.target means that when the service is enabled, systemd creates the appropriate symbolic link so that the service is started as part of the normal multi-user boot target.
This is what allows the USB device to be automatically exported after every reboot.
Remark usbip_core and usbip_host could also be started at boot time through those commands but I prefer to have everything in one place so that the service has everything it needs to run by itself.
echo "usbip_core" | sudo tee -a /etc/modules
echo "usbip_host" | sudo tee -a /etc/modules
BUSID explained
Let's take a closer look at the command used to automatically find the USB device:
/bin/bash -c "BUSID=$$(usbip list -p -l | grep '0403:6001' | awk -F'#' '{print $$1}' | awk -F'=' '{print $$2}'); if [ -n \"$$BUSID\" ]; then usbip bind -b $$BUSID; fi"This Bash command runs the following script as a single line:
BUSID=$$(usbip list -p -l | grep '0403:6001' | awk -F'#' '{print $$1}' | awk -F'=' '{print $$2}');
if [ -n \"$$BUSID\" ];    # if BUSID is not empty
	then usbip bind -b $$BUSID;
fi
BUSID is assigned the bus ID through a series of piped commands:
Because this command is executed through a systemd unit file, the $ characters had to be escaped as $$.
usbip list -p -l | grep '0403:6001' | awk -F'#' '{print $1}' | awk -F'=' '{print $2}'Let's look at it step by step.
usbip list -p -lThe -p option is important here because it asks usbip to output the device information in a machine-parsable format.
In my case it returns:
busid=1-1#usbid=0403:6001#
1. Find the RFXcom
First, we filter the output using the USB vendor/product ID:
There could be several USB devices connected to the Raspberry Pi, so filtering by 0403:6001 allows us to identify the device we want to export.
usbip list -p -l | grep '0403:6001'This keeps only the line corresponding to the RFXcom:
busid=1-1#usbid=0403:6001#
2. Extract the BUSID field
Next, we split the line at every # character:
usbip list -p -l | grep '0403:6001' | awk -F'#' '{print $1}'awk -F'#' tells awk to use # as the field separator.
we therefore get:
busid=1-1
3. Extract the value
Finally, we split the remaining text at the = character, keeping the second part:
usbip list -p -l | grep '0403:6001' | awk -F'#' '{print $1}' | awk -F'=' '{print $2}'So, BUSID is assigned the value 1-1.
Type=oneshot explained
The service uses:
Type=oneshot
A oneshot service is designed to execute one or more commands and then finish.
This is different from a typical long-running service such as a web server.
In our case, the usbip-export.service itself does not need to remain running. Its job is to:
- load the required USB/IP kernel modules;
- start the
usbipddaemon; - find the RFXcom USB device;
- bind the device to USB/IP.
The usbipd daemon then continues running in the background because it was started with:
usbipd -D
This is why Type=oneshot is appropriate here.
I also use:
RemainAfterExit=yes
This tells systemd to consider the service active after all of its commands have completed successfully.
This is why the service can later show:
Active: active (exited)
The exited part does not mean that the USB/IP server has stopped. It means that the oneshot service itself has finished executing its startup commands while the daemon it launched continues to run.
For comparison, systemd provides several other service types:
| Type | Typical use |
|---|---|
simple |
A process that starts and remains in the foreground |
forking |
A traditional daemon that forks into the background |
oneshot |
A command or sequence of commands that runs and finishes |
notify |
A service that explicitly notifies systemd when it is ready |
exec |
Similar to simple, with systemd waiting until the executed process has successfully started |
For this particular service, oneshot combined with RemainAfterExit=yes is a good fit.
Managing the service
Before enabling usbip-export.service for real, here is a quick reference of the systemctl and journalctl commands you'll use to manage it. These commands are generic — the same ones will apply later to the client-side service.
Once the service file has been created or modified, systemd needs to reload its configuration
sudo systemctl daemon-reloadThis does not start the service. It simply tells systemd to reload its configuration and detect the new or modified unit file.
To enable the service at boot:
sudo systemctl enable usbip-export.serviceThis creates the symbolic link required by the WantedBy=multi-user.target section of the service file.
To start the service immediately:
systemctl start usbip-export.serviceAlternatively, enable --now combines both operations:
sudo systemctl enable --now usbip-export.serviceThis enables the service for future boots and starts it immediately.
To check its current status:
systemctl status usbip-export.serviceIf something goes wrong, the systemd journal provides the service logs:
journalctl -u usbip-export.serviceFor a more useful view while troubleshooting, you can also follow the logs live:
journalctl -u usbip-export.service -fTo stop the service immediately:
sudo systemctl stop usbip-export.serviceInstallation continues - Enable and start the service
Let's now actually apply the commands above: reload the configuration, enable the service, and start it, all in one line:
sudo systemctl daemon-reload && sudo systemctl enable --now usbip-export.serviceThen check its status:
systemctl status usbip-export.serviceA successful configuration should look similar to:
● usbip-export.service - Export automatic USB/IP RFXcom
     Loaded: loaded (/etc/systemd/system/usbip-export.service; enabled; preset: enabled)
     Active: active (exited) since Fri 2026-08-07 00:34:05 CEST; 14h ago
 Invocation: 4f10881a312b408d812cc64b0656abab
   Main PID: 931 (code=exited, status=0/SUCCESS)
      Tasks: 1 (limit: 449)
        CPU: 40.752s
     CGroup: /system.slice/usbip-export.service
             └─925 /usr/sbin/usbipd -D
The important parts are:
Loaded: ... enabled
which confirms that the service is enabled and will be started during boot, and:
Active: active (exited)
which is expected for our Type=oneshot service.
At this point, the Raspberry Pi is exporting the USB device and is ready to accept USB/IP connections from the client.
This completes the Raspberry Pi server side.
Client side — Proxmox
The Proxmox host is the USB/IP client.
It will connect to the Raspberry Pi, import the remote USB device, and expose it to Linux as a local USB device.
As on the Raspberry Pi, we can use a custom systemd service to make the connection automatic and resilient to temporary network outages.
Let's create a service called usbip-rfxcom.service:
nano /etc/systemd/system/usbip-rfxcom.serviceMy service looks like this:
[Unit]
Description=USB/IP RFXcom connection
After=network-online.target
Wants=network-online.target
StartLimitIntervalSec=0

[Service]
Type=oneshot
RemainAfterExit=yes

Environment="USBIP_SERVER=192.168.0.16"
Environment="USBIP_BUSID=1-1"

ExecStartPre=/sbin/modprobe vhci_hcd

ExecStartPre=-/bin/bash -c "PORT=$$(usbip port | grep -B 1 '0403:6001' | grep 'Port' | awk '{print $$2}' | tr -d ':'); if [ -n \"$$PORT\" ]; then usbip detach -p $$PORT; fi"

ExecStart=/bin/bash -c "/usr/sbin/usbip attach -r ${USBIP_SERVER} -b ${USBIP_BUSID}"

ExecStop=-/bin/bash -c "PORT=$$(usbip port | grep -B 1 '0403:6001' | grep 'Port' | awk '{print $$2}' | tr -d ':'); if [ -n \"$$PORT\" ]; then usbip detach -p $$PORT; fi"

Restart=on-failure
RestartSec=30s

[Install]
WantedBy=multi-user.target
Replace USBIP_SERVER with the IP address of your Raspberry Pi and USBIP_BUSID with the BUSID of the USB device exported by the Raspberry Pi.
In my setup:
Environment="USBIP_SERVER=192.168.0.16"
Environment="USBIP_BUSID=1-1"
The vhci_hcd module
The client needs the vhci_hcd kernel module:
ExecStartPre=/sbin/modprobe vhci_hcdvhci_hcd provides the virtual USB host controller used by USB/IP on the client side.
It allows the remotely attached USB device to appear to Linux as a USB device connected to a virtual USB bus.
Making the service resilient
There are three settings that are particularly important here:
StartLimitIntervalSec=0
Restart=on-failure
RestartSec=30s
StartLimitIntervalSec=0
systemd normally protects services from continuously restarting when they repeatedly fail.
This protection can eventually result in:
Start request repeated too quickly
For this service, that behaviour would not be desirable.
The Raspberry Pi may simply be temporarily unavailable because of a reboot, a power outage, or a network problem.
Setting:
StartLimitIntervalSec=0disables this start-rate limit.
The service can therefore continue trying indefinitely.
Restart=on-failure
This tells systemd to restart the service when it terminates with a failure.
For example, if the Raspberry Pi is powered off or unreachable when the usbip attach command is executed, the command will fail and systemd will restart the service.
RestartSec=30s
This specifies how long systemd waits before attempting the restart:
RestartSec=30sThirty seconds is long enough to avoid continuously hammering the Raspberry Pi or the network while still providing reasonably quick recovery after a temporary failure.
Environment variables
The Raspberry Pi address and the USB/IP BUSID are defined as environment variables:
Environment="USBIP_SERVER=192.168.0.16"
Environment="USBIP_BUSID=1-1"
This makes the actual usbip attach command easier to maintain:
ExecStart=/bin/bash -c "/usr/sbin/usbip attach -r ${USBIP_SERVER} -b ${USBIP_BUSID}"The command therefore becomes equivalent to:
usbip attach -r 192.168.0.16 -b 1-1The -r option specifies the remote USB/IP server and -b specifies the BUSID of the device to attach.
Because the variables are expanded by the shell, the command is executed through bash -c.
Finding the USB/IP port
The BUSID identifies the physical USB device on the Raspberry Pi.
Once the device has been attached on the Proxmox side, USB/IP assigns it a local virtual port.
We can see the currently imported USB devices with:
usbip portFor example:
Imported USB devices
====================
Port 00: <Port in Use> at Full Speed(12Mbps)
       Future Technology Devices International, Ltd : FT232 Serial (UART) IC (0403:6001)
       3-1 -> usbip://192.168.0.16:3240/1-1
           -> remote bus/dev 001/002
Here, the relevant information is:
Port 00: <Port in Use>
We need the port number (00) when we want to detach the device.
The service therefore has to find this port automatically.
Just like we did for the BUSID on the Raspberry Pi, we can extract it using a sequence of shell commands.
First, let's keep the USB device line and the line immediately before it:
usbip port | grep -B 1 '0403:6001'The -B 1 option means "include one line before the matching line".
The result is:
Port 00: <Port in Use> at Full Speed(12Mbps)
       Future Technology Devices International, Ltd : FT232 Serial (UART) IC (0403:6001)
We are now interested only in the line containing Port:
usbip port | grep -B 1 '0403:6001' | grep 'Port'This gives:
Port 00: <Port in Use> at Full Speed(12Mbps)
Next, we use awk to extract the second field:
usbip port | grep -B 1 '0403:6001' | grep 'Port' | awk '{print $2}'The fields are separated by whitespace, so this produces:
00:
Finally, we remove the colon:
tr -d ':' removes (-d = delete) the colon character
usbip port | grep -B 1 '0403:6001' | grep 'Port' | awk '{print $2}' | tr -d ':'The result is:
00
PORT is assigned 00.
This value is the USB/IP port number we need for usbip detach:
usbip detach -p 00The complete command is used in both ExecStartPre and ExecStop of our systemd service.
The Exec... commands
There are three commands in the service that deserve a closer look:
ExecStartPre=-/bin/bash -c "PORT=(...); if [ -n "$$PORT" ]; then usbip detach -p $$PORT; fi"

ExecStart=/bin/bash -c "/usr/sbin/usbip attach -r ${USBIP_SERVER} -b ${USBIP_BUSID}"

ExecStop=-/bin/bash -c "PORT=(...); if [ -n "$$PORT" ]; then usbip detach -p $$PORT; fi"
They handle the complete lifecycle of the remote USB device.
ExecStartPre — detach first
Before attempting to attach the remote device, the service first checks whether the device is already attached:
ExecStartPre=-/bin/bash -c "PORT=$$(usbip port | grep -B 1 '0403:6001' | grep 'Port' | awk '{print $$2}' | tr -d ':'); if [ -n \"$$PORT\" ]; then usbip detach -p $$PORT; fi"The command finds the USB/IP port associated with the RFXcom and detaches it if one is currently in use.
This is mainly a precaution.
For example, if the service is restarted after a previous connection was not cleaned up correctly, the device may still appear as attached. Detaching it first gives us a clean state before attempting a new attach.
The command starts with:
-
This prefix has a special meaning in a systemd Exec* command: systemd ignores a non-zero exit status from that command.
This is useful here because, during a normal first startup, there may be nothing to detach.
Without the -, a failed usbip detach could cause the ExecStartPre step to fail and prevent the main ExecStart command from being executed.
ExecStart — attach the remote USB device
The actual connection is made by:
ExecStart=/bin/bash -c "/usr/sbin/usbip attach -r ${USBIP_SERVER} -b ${USBIP_BUSID}"With the variables from our service:
Environment="USBIP_SERVER=192.168.0.16"
Environment="USBIP_BUSID=1-1"
this is effectively:
usbip attach -r 192.168.0.16 -b 1-1The -r option specifies the remote USB/IP server.
The -b option specifies the BUSID of the device exported by that server.
If the operation succeeds, the RFXcom is imported through USB/IP and becomes visible to Linux on the Proxmox host.
ExecStop — clean up when stopping
The service also defines:
ExecStop=-/bin/bash -c "PORT=$$(usbip port | grep -B 1 '0403:6001' | grep 'Port' | awk '{print $$2}' | tr -d ':'); if [ -n \"$$PORT\" ]; then usbip detach -p $$PORT; fi"
This command is executed when the service is stopped normally, for example with:
systemctl stop usbip-rfxcom.serviceIt is also useful during a normal system shutdown.
The command finds the USB/IP port currently used by the RFXcom and detaches it:
usbip detach -p <PORT>This leaves the USB/IP client in a clean state instead of leaving an imported device behind.
The - prefix is used here for the same reason as with ExecStartPre: if there is no device to detach, a failure should not prevent the service from stopping.
Complete lifecycle
The service therefore follows this sequence:
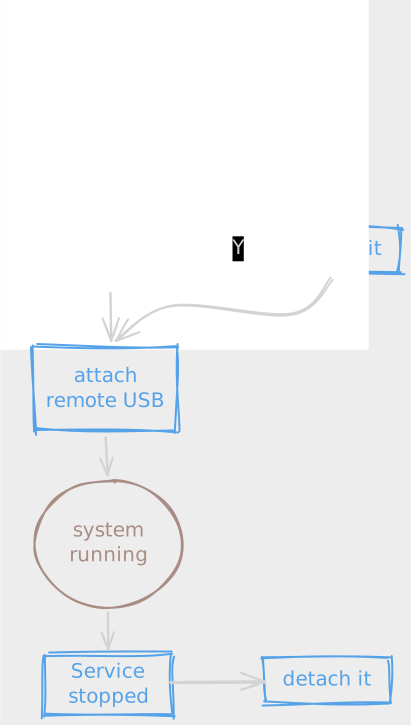
This gives us a clean and repeatable startup and shutdown sequence.
Installation continues again - Enable and start the client service
Once usbip-rfxcom.service has been created, reload the systemd configuration and enable the service:
sudo systemctl daemon-reload && sudo systemctl enable --now usbip-rfxcom.serviceThis both enables the service for future boots and starts it immediately.
Check its status:
systemctl status usbip-rfxcom.serviceIf everything is working correctly, the remote USB device should now be attached to the Proxmox host.
You can verify this with:
lsusbThe RFXcom should appear in the list of USB devices, just like a locally connected USB device:
Bus 001 Device 001: ID 1d6b:0002 Linux Foundation 2.0 root hub
Bus 002 Device 001: ID 1d6b:0003 Linux Foundation 3.0 root hub
Bus 003 Device 001: ID 1d6b:0002 Linux Foundation 2.0 root hub
Bus 003 Device 015: ID 0403:6001 Future Technology Devices International, Ltd FT232 Serial (UART) IC
Bus 004 Device 001: ID 1d6b:0003 Linux Foundation 3.0 root hub
The important line is:
Bus 003 Device 015: ID 0403:6001 Future Technology Devices International, Ltd FT232 Serial (UART) ICThe device is now visible from the Proxmox host's USB subsystem even though the physical RFXcom is connected to the Raspberry Pi.
From the perspective of Linux applications running on the Proxmox host, it can now be accessed like a normal USB device. In my case, Home Assistant uses the RFXcom through this USB/IP connection.
The USB/IP setup is complete.
 Retour aux articles